Table of Contents
What is Facial Recognition? What is artificial intelligence Pre-trained models Steps need to be followed ConclusionWhat is Facial Recognition?
Over the last few years, facial recognition technology has grown in popularity. Face detection in psychology refers to the act of identifying and focusing on faces in a scene.
To do this, a person’s face from a digital photo or video source must be uniquely identified. Face recognition has been developed since the 1960s, but because of developments in IoT, AI, ML, and other technologies, it has gained widespread acceptance very rapidly.
Face recognition technology has improved to the point that it is currently utilized in a variety of contexts.
This blog post will discuss how to recognize faces using machine learning! We’ll utilize a pre-built, modified version of Scratch Programming (referred to as a “fork”) that has unique extensions developed by Machine Learning for Kids.
This project will utilize IBM Watson, a cloud-based machine learning engine, together with Scratch to construct a mask that follows you by recognizing your face in the webcam and overlaying it with amusing sprites!
What is artificial intelligence?
Artificial intelligence (AI) includes things like self-driving automobiles and chess-playing robots. The finest AI films are The Matrix and The Terminator. The human brain has been programmed to learn and become clever. We apply our brains to learn new things, play chess, and other activities.
- Prevent Human Death, Increase Luxurious Living, etc. These are a few benefits of utilizing AI.
- Enabling robots to behave intelligently in the same way that people do is the primary goal of AI development.
- AI is incredibly effective for humans since, whether intentionally or inadvertently, people make mistakes.
- AI has eliminated manual errors, including calculating errors, operating errors, and managing errors.
- AI reliably completes every task. AI gives already-made items more intelligence. AI aims to mimic human behavior and thought processes in machines.
What is Machine Learning?
This free tool teaches machine learning through hands-on experiences with training machine learning systems and making things with them.
It offers a user-friendly, guided environment for teaching machine learning models to identify sounds, text, numbers, or pictures.
By integrating these models into the educational coding platforms Scratch and App Inventor, and enabling kids to develop projects and games using the machine learning models they train, this expands on previous attempts to introduce and teach coding to kids.
Since its first release in 2017, thousands of families, code clubs, and schools worldwide have been using the application.
We encounter machine learning everywhere. Every day, machine learning systems are used by all of us in the form of spam filters, fraud detection systems, chatbots and digital assistants, recommendation engines, language translation services, and search engines.
Machine learning algorithms will soon be standard equipment in our automobiles, aiding medical professionals in the diagnosis and treatment of our ailments.
Children must understand the workings of our world. Being able to construct with this technology oneself is the greatest approach to understanding its potential and significance.
The program may be used without the need for complex setups or installs because it is fully web-based. It was created for usage in classrooms by educational institutions and kid-run volunteer coding clubs. Teachers and group leaders may manage and grant access to their pupils using the admin page.
It has been developed by Dale Lane with IBM Watson APIs.
Pre-trained models:
Students can also utilize pre-trained models for their projects. These sophisticated models make it possible for students to work on projects that would otherwise be too difficult for them to train themselves on, and they also provide them with practical experience exploring some of the other applications of machine learning.
We may utilize pre-trained models from Machine Learning for Kids in your projects. Models that have previously been trained by others are frequently used in practical machine learning tasks. Freely accessible well-trained models are in handy when you don’t have the time to gather the necessary quantity of training data to train your model.
Let’s now look at an example of a scratch project that uses machine learning to identify faces. We are going to use pre-trained models of machine learning for this project.
A machine learning method called face detection locates the coordinates of a face in an image.
Two stages are involved:
1. Object detection: During this phase, the system looks for any area in a picture that appears to have a face.
2. Shape detection: It makes predictions about the most likely locations of the eyes, mouth, and nose at this stage. Another term for this is facial landmarks.
In this exercise, we will create a Scratch project by manipulating sprites to follow various facial features. The image of our face in the webcam will line up with our emoji mask in costumes of sprites.
Steps need to be followed:
Here is the step by step guide to followed to build the facial recognition
Step 1: Visit the Machine Learning for kids website within a web browser. Some of the pre-trained machine learning models that are at your service are shown on this page. We’ll be utilizing the Face Detection model for this project.
Step 2: Select “Get started” by clicking. Machine learning for kids scratch is going to be open.
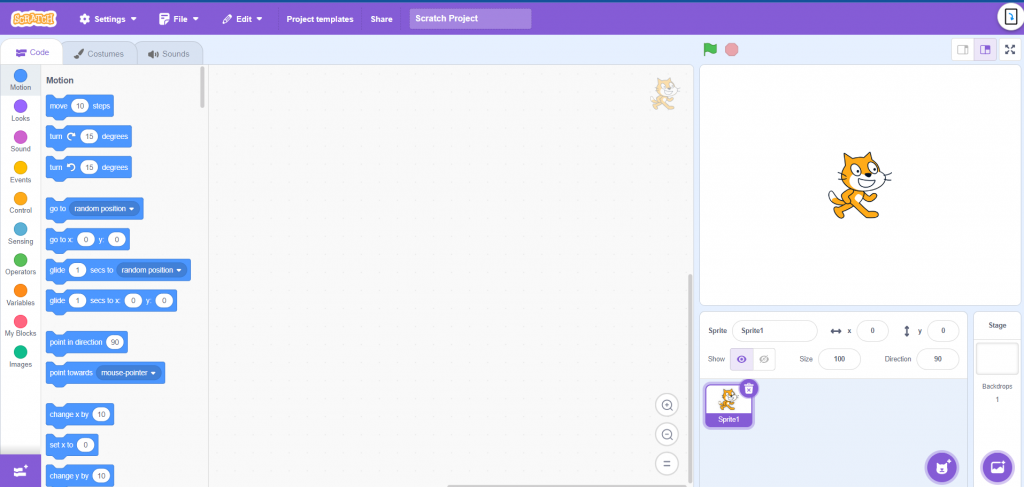
Figure 1: Machine Learning for kids scratch.
Step 3: Launch the Extensions window.
On the lower left, click the blue button with the + sign.
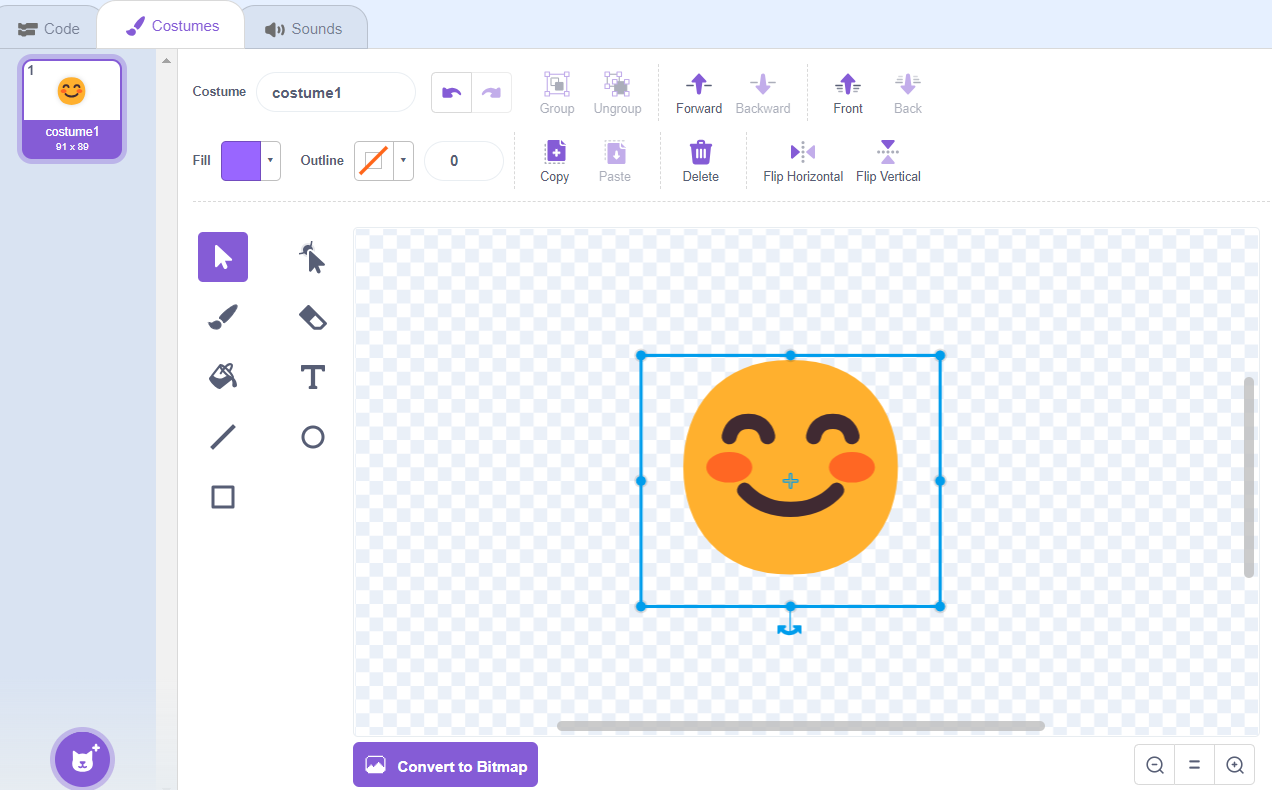
Figure 2: Add Extension of Machine Learning for kids scratch.
Step 4: Select the Video Sensing extension.
For our project to use the camera, we will require this extension.
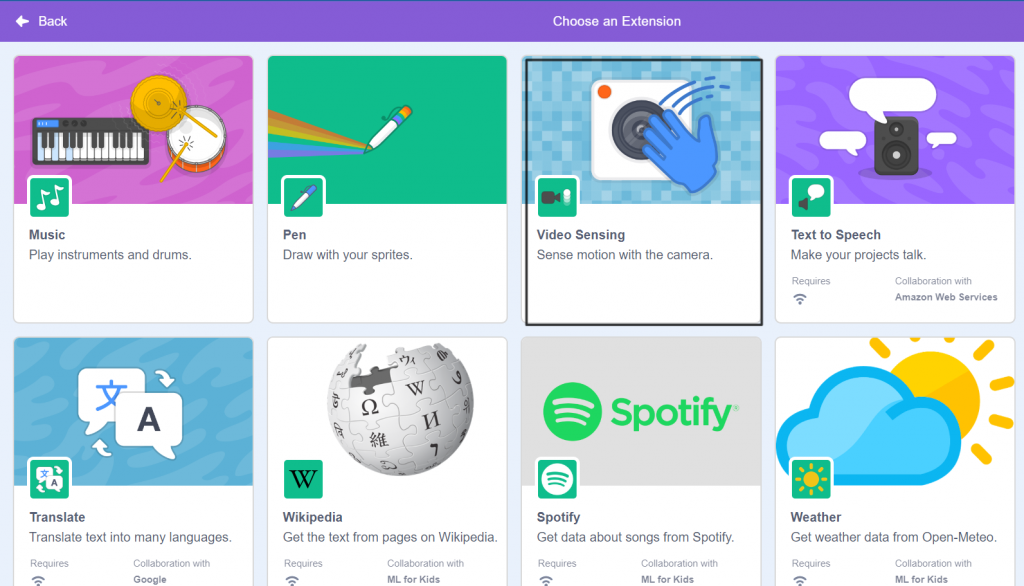
Figure 3: Video Sensing extension of Machine Learning for kids scratch.
Step 5: Open up the Extensions window.
Press the Face detection extension.
To utilize the pre-trained machine learning model that locates our face in the webcam feed, we must have this extension.
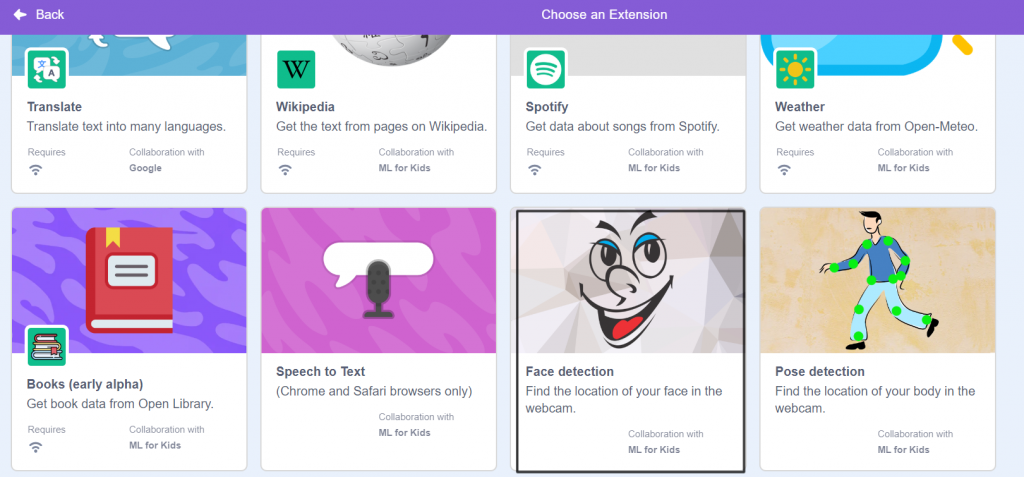
Figure 4: Face detection extension of Machine Learning for kids scratch.
Step 6: Click the trashcan icon to delete the cat sprite.
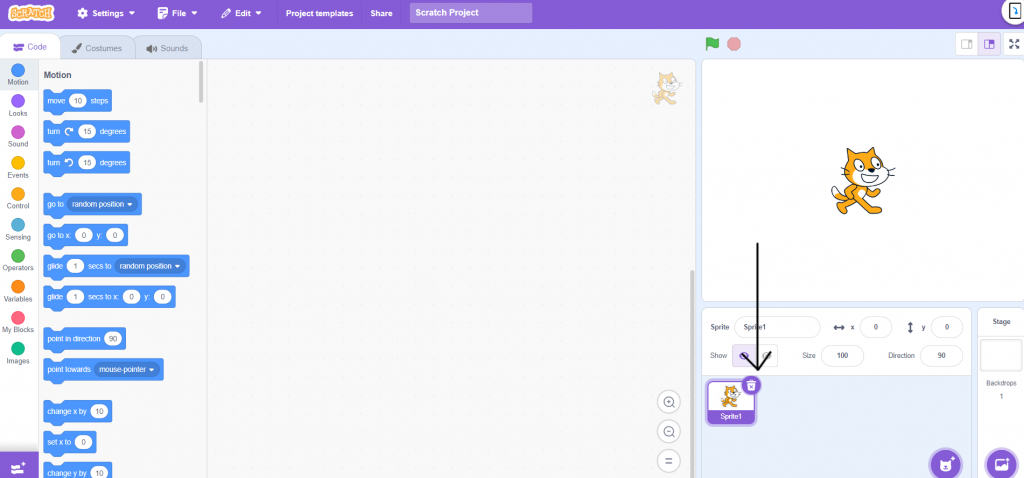
Figure 5: Deleting cat sprite.
Step 7: Use the Paintbrush button to create a new sprite.
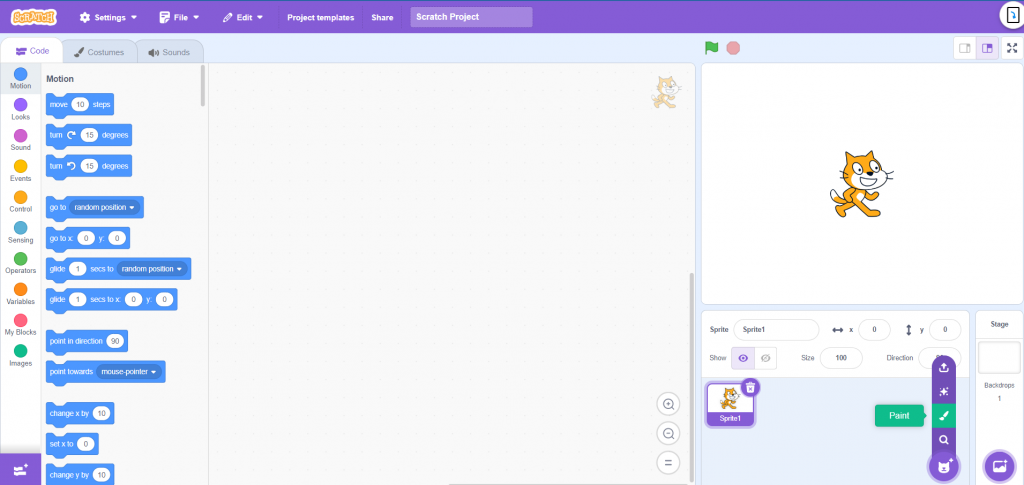
Figure 6: Paintbrush button.
Step 8: To insert a face emoji, click the T text tool. If you’re using Windows, tap the Windows button +. button to add an emoji from your keyboard.
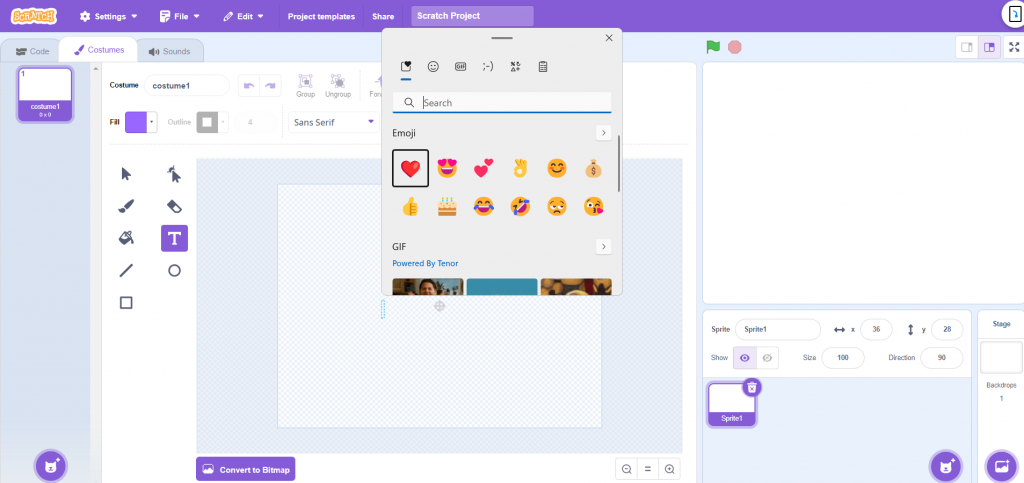
Figure 7: Insertion of face emoji.
Step 9: To make the face bigger and move it to the center of the sprite canvas, use the arrow tool.
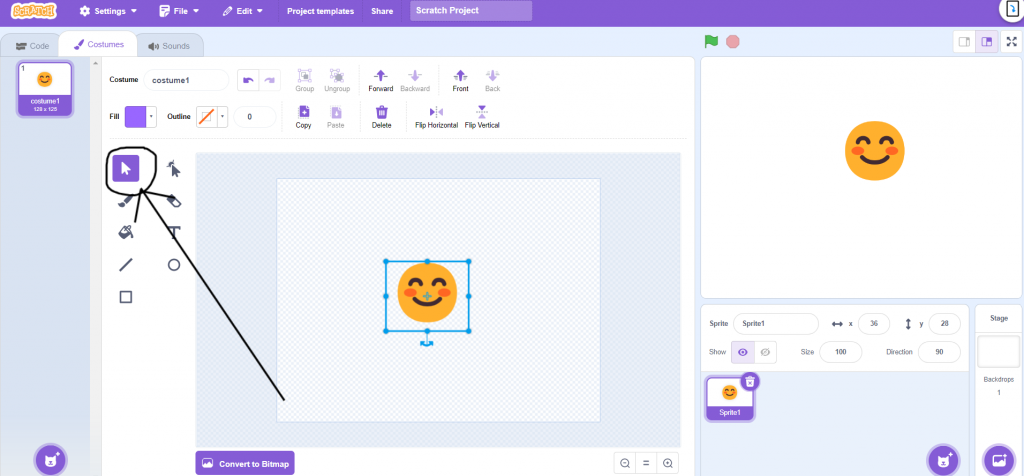
Figure 8: Arrow tool of scratch.
Step 10:
To begin your project, add a when green flag and click block first.
Next, add a turn video on the block and set video transparency to 0 block to utilize Video Sensing blocks to turn on the camera and set the picture to 100% opaque when the project starts.

Figure 9: Video sensing blocks.
To verify your work and watch the camera come live, click the green flag.
If your browser asks for permission to use your camera, grant it.
Step 11:
Afterwards, we will include the code that will enable the mask to recognize and track our face.
Include a forever block from the Control blocks men at the bottom of our script.

Figure 10: Forever block from control.
Step 12:
Add set x and set y blocks to the forever loop block from motion.

Figure 11: set x and set y from motion.
Step 13:
Open the Face detection blocks menu, choose the webcam-selected tiny rounded x and y coord of nose blocks, and then place them in the appropriate locations within the set x and set y block (be careful to match x with x and y with y!).

Figure 12: x and y coordinates from face detection.
Step 14:
From the looks, use set size to block and then place the multiplication block from operators within the set size block. Then add the size of the left eye into the webcam block from face detection.
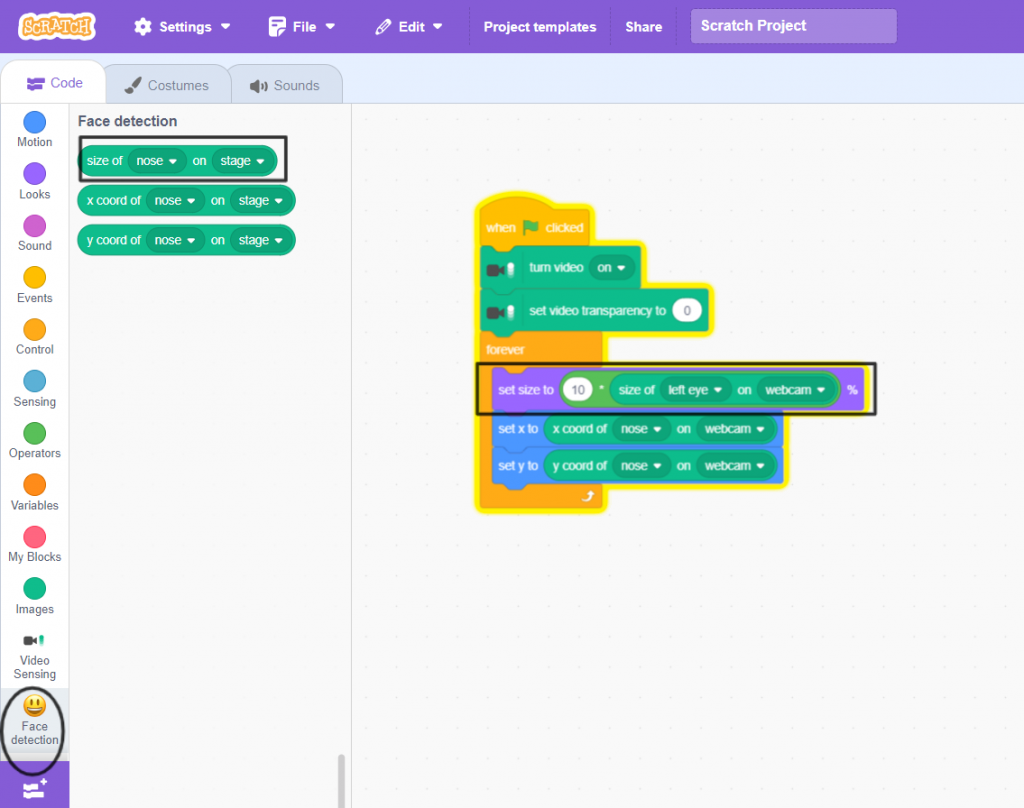
Figure 13: size of left eye block from face detection.
This is the script to change the size to fit the face’s dimensions.
The number 10 may need to be altered based on the size of the sprite.
Step 15:
Click the Green Flag to test again.

Figure 14: Output 1.
Models that have previously been trained by others are frequently used in practical machine-learning tasks. When you don’t have enough time to gather your training data, it’s an excellent approach to rapidly create a project.
The next step is to update your project so that when you rotate your head, the mask and sprite follow the angle of your face!
Step 16:
To create the variable “angle,” click “Make a Variable in variables.”
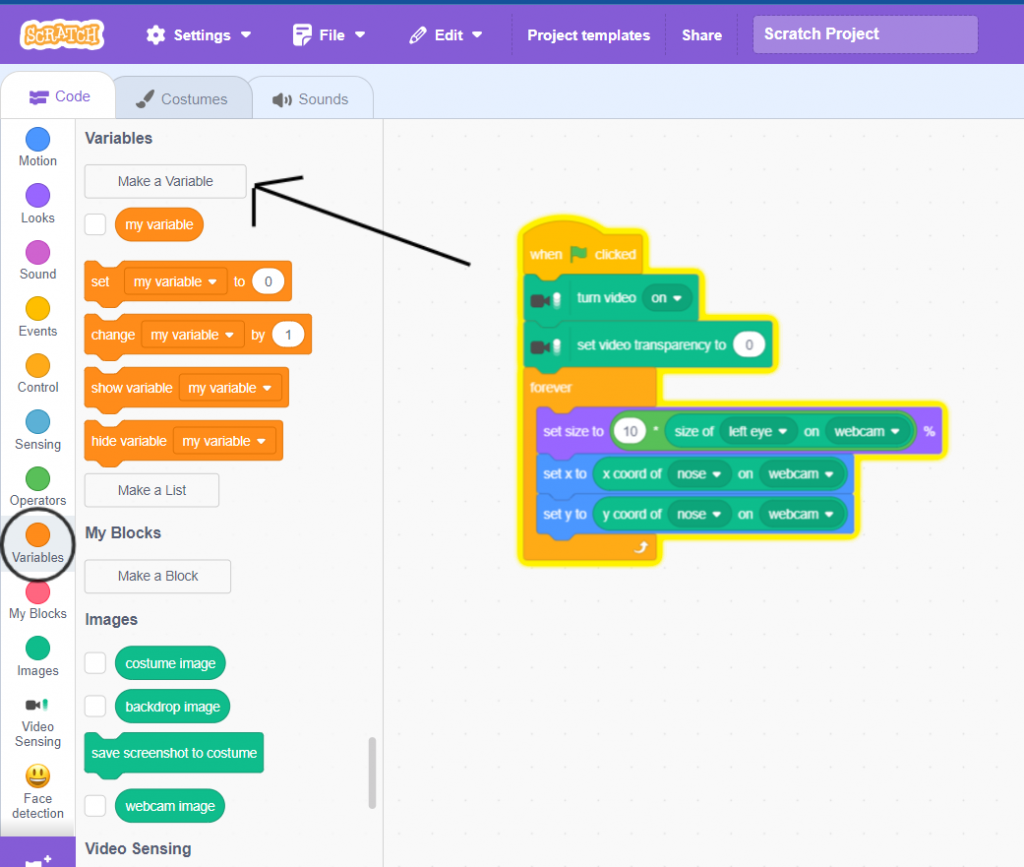
Figure 15: Make a variable.

Figure 16: Make angle variable.
Step 17:
To create my block “calculate rotation,” click “Make a block in my blocks.”

Figure 17: Make a block.

Figure 18: Make a calculate rotation block with 4 inputs.
This will compute the angle between those two places using the machine learning model’s prediction of where your eyes are.
Four numbers must be entered into the script: two for the left eye’s location (x and y coordinate) and two for the right eye’s location (x and y coordinate).
Step 18:
We must write a script that calculates the angle between two points using the trigonometry function, called atan.
To determine the angle variable value, which is either 90 or -90 when left eye y = right eye y and left eye x < right eye x, or atan of (right eye x – left eye x) / (right eye y – left eye y) or 180 + ((right eye x – left eye x) / (right eye y – left eye y) ) when left eye y < right eye y, we must create this script in the define calculate rotation block. We will compare left eye x with right eye x as well as left eye y with right eye y.

Figure 19: Calculate Rotation block code.
Step 19:
In order to use our new trigonometric function developed in calculate rotation, we must update our script when green flag is clicked.
For the face mask to change by face rotation, we also need to include the angle variable in the point in the direction block from motion.

Figure 20: Main blocks of code.
Step 20:
To test your project, click the green flag. Attempt to tilt your head and see if the emoji mask spins accordingly. After a predetermined amount of time, we can change the face emoji to provide a glimpse of animation.
The following block of code is used to switch between your two costumes so that your mask animates. For that, we need to add one more emoji in the costume of the emoji sprite.
To your Sprite, add a second costume. To add another costume to your Sprite, repeat steps 7, 8, and 9 above. Make sure the emoji in the second costume is of the same size and location as the first emoji costume.
To have the emoji animated as you switch between two costumes, we need to add a new script.

Figure 21: Emoji Animation code blocks.
To test, click the green flag. When your face moves in the webcam, the emoji mask should also animate to correspond.
If you tilt your head, it should rotate accordingly.
It should enlarge to correspond with your closer proximity to the webcam. It should get smaller to correspond with your distance from the webcam.
Conclusion:
We have created a Scratch Programming project that uses face detection, a machine-learning approach that locates faces in images.
It accomplishes that in two steps.
Initially, there is “object detection.” It locates the area of the picture that appears to have a face on it. Imagine it as the computer predicting the location of a face and drawing a box around it.
Predicting shape is the second step. It forecasts the location of the mouth, nose, and eyes in the first stage’s sketched box. This is commonly referred to as “facial landmark” detection.
Since it has been trained on a variety of photo samples featuring a wide range of facial expressions, all it is searching for is anything that resembles a human face.
“Face detection” is a practical feature. Similar to what you created in this project, you may have seen mobile applications employ video face filters to add entertaining effects to videos.
Other practical applications include the ability to count the number of individuals that a video camera can view automatically or to obscure people’s faces in pictures when you don’t have permission to publish their images.


